How to export IFC files from Revit
Share this post
What is Revit?
Revit is a powerful Building Information Modeling (BIM) software from Autodesk that helps architecture, engineering, and construction (AEC) teams work together more effectively to create high-quality buildings and infrastructure. The Revit software allows users to design a building and structure and its components in three dimensions (3D), annotate the model with two-dimensional (2D) drafting elements, and access building information from the Revit BIM database. Revit supports a multidisciplinary workflow that helps AEC professionals coordinate their efforts more effectively and avoid errors. Revit also provides a rich set of features for creating construction documents, such as structural plans, electrical diagrams, plumbing diagrams, and all other types of drawings. Revit BIM software is an essential tool for anyone who wants to streamline the building design and construction process. Thanks to Revit, the AEC industry is becoming more efficient and productive, while also creating better buildings.
The Autodesk Revit tool has been gaining popularity in the construction industry over recent years. It was first released on April 5, 2000, and since then it’s become one of the most widely used BIM software for architects
With all these new features being added each year by Autodesk- they seem focused on really pulling up AEC requirements into their massive ecosystem by providing useful.
What is GAMMA AR?
GAMMA AR is a construction App that simplifies the management of your construction projects by overlaying BIM Models on the job site. It uses Augmented reality to let you visualize your plans in real life, so you can compare them with the actual progress of work. This saves you money and time that would be spent on rework and useless efforts. GAMMA AR is a useful tool for construction managers, BIM managers, architects, MEP planners, structural engineers, … and other stakeholders who want to have a better overview of their projects and make sure that they are proceeding according to plan. Thanks to GAMMA AR, construction management just got a whole lot easier.
GAMMA AR connects the field and the office, in order to prevent errors, improve communication, and bring clarity and transparency to the construction projects. The GAMMA AR app and portal feature real-time issues, progress tracking, and component based RFIs. It simplifies tracking the construction progress, manages issues, and facilitates building handovers. Using GAMMA AR makes construction projects more efficient and effective.
How to export IFC from Revit to GAMMA AR Platform
The prerequisites
It is important to know that before you start exporting, there are a few prerequisites that must be met. Below we will explain these requirements before we go into the appropriate export settings. These steps will help you to have a smooth and trouble-free export.
1. No 2D Elements
The feature of displaying information from 2D plans is not yet available in GAMMA AR. Therefore, the model must be in a reasonable stage of development before being exported.
2. Add mandatory elements
To be able to position the model on a construction site in augmented reality afterward, the model must contain certain elements that are considered necessary. Indeed, your models must contain at least one of the following elements: For example, walls, which are generally the easiest spaces to add, or columns. One of these elements is essential to be able to use the GAMMA AR application correctly.
3. Correct reference levels
Although there are no file size limitations, the GAMMA AR application relies on allocating elements to reference levels correctly. This is especially important for complex multi-level projects. Therefore, you should always make sure that all elements are referenced to the correct levels.
4. Reducing the scope of what should be exported
In case you have a very large project that is not naturally divided, such as by different levels, you should think of reducing the scope of what needs to be exported, we will explain this later.
Preparation for export
Step 1: Model preparation in Revit
Creating custom views in Revit
In Revit, you can create custom views according to your site workflow. Your model can be prepared according to your preferences. GAMMA AR is capable of easily representing not only any 3D view but also the phases of the plan. So, when exporting a prepared 3D view, you make sure that the application has 3D IFC parts to work with. So, let’s take you through some basic steps to fully customized 3D views.
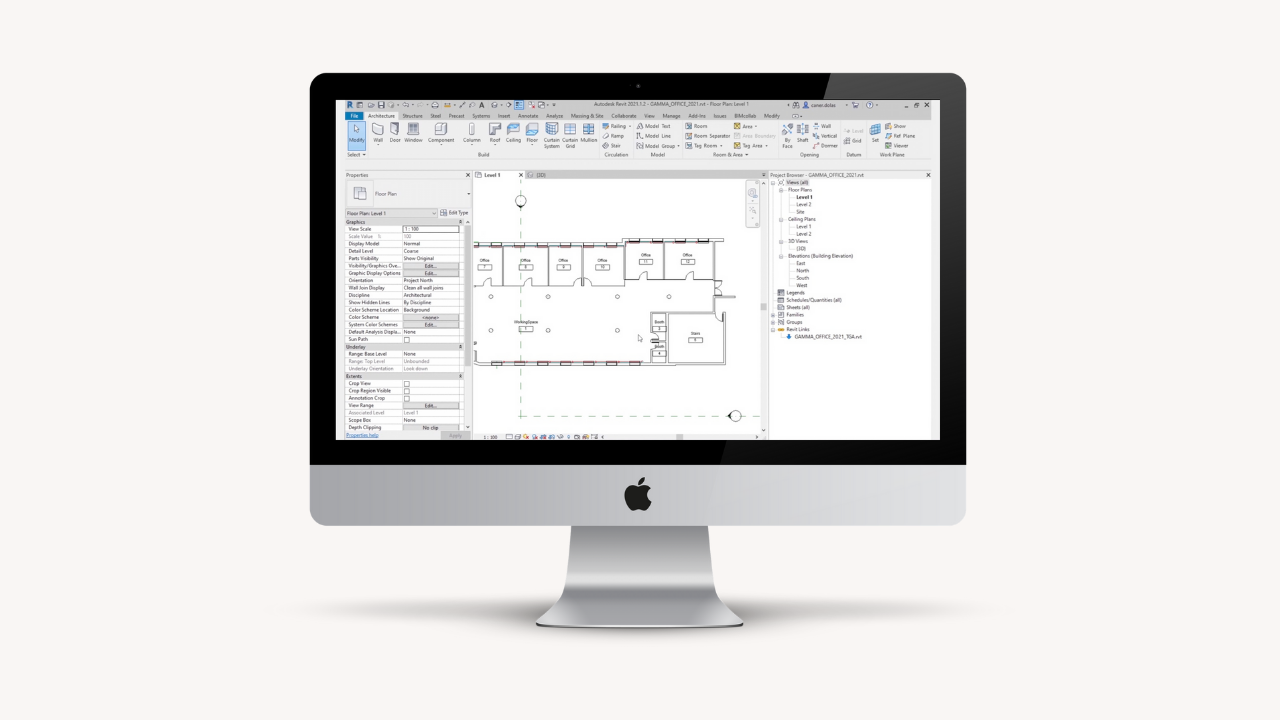
Create a new 3d view
Start by creating a new 3D view very easily by clicking on the button in the quick toolbar at the top.

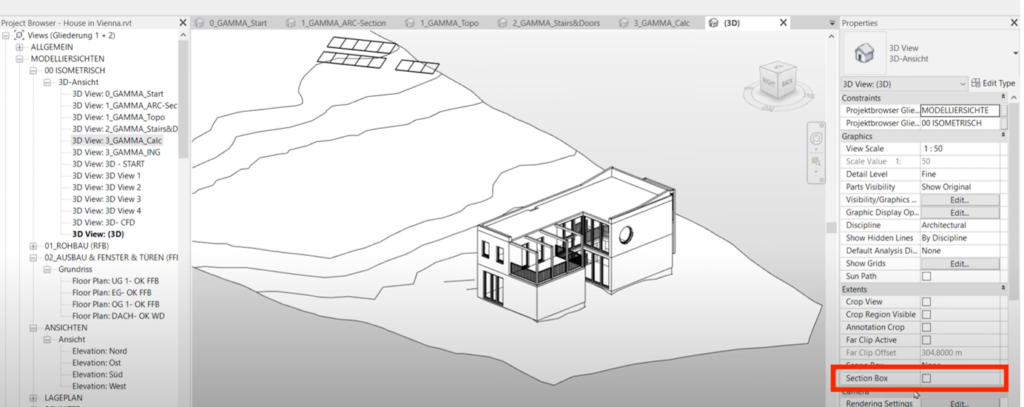
Choose to export the entire model or only a section of it
Depending on the needs of your project you can export the whole model or just a section of it. For example, if the project requires a small part of the building to be exported, such as a specific room or area, limiting the view to that area may be appropriate.
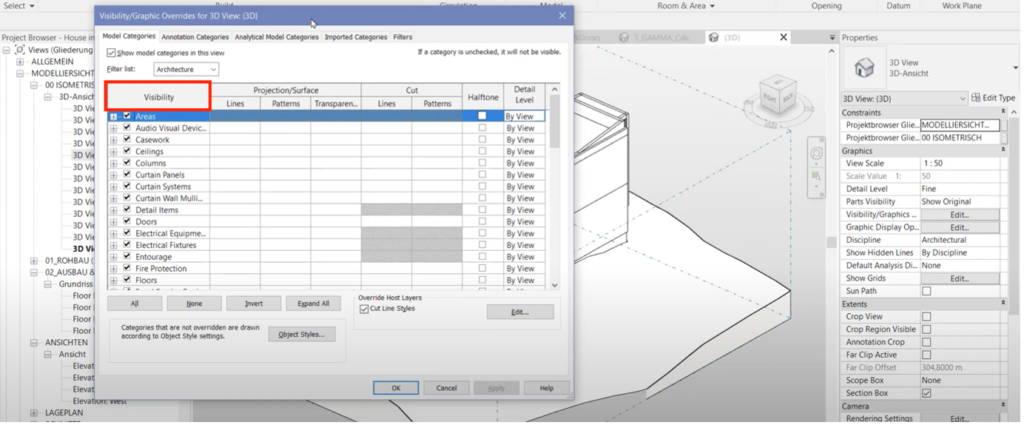
Choose between all the model information or only a specific group of elements
You need to think about whether your project requires all the information on the model or only a specific group of elements such as HVAC or doors.
To make these elements visible or invisible, you need to configure the “visibility overrides” tab:
- Tap VV on your keyboard to display the configuration table
- Select the categories you want to show or hide by scrolling through the menus for detailed control
Make the load-bearing architectural elements visible
Even though GAMMA AR does not require the export of at least one wall or column, it is usually a good idea to have at least some, if not all, of the load-bearing architectural elements visible. This makes it much easier to position itself later and to determine the location of the information in the 3D model being planned about the construction environment on the site.
Step 2: IFC Export Settings in Revit
It is important to know that there are a few specific settings that need to be selected to optimize GAMMA AR’s performance. Now, let’s explain exactly how to set them and save the configuration for future exports.
Exclude the areas from the export
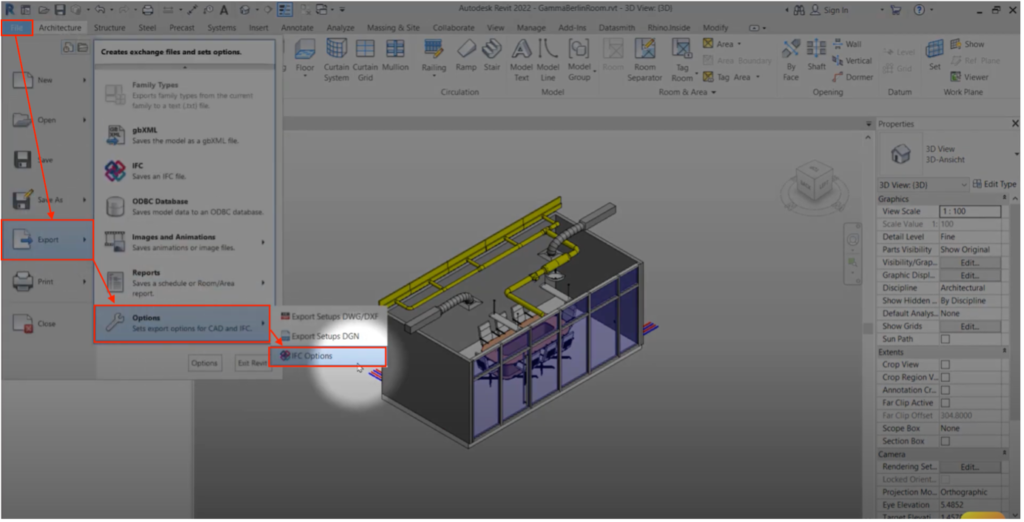
The first thing to do is to configure the IFC options and exclude the areas from the export.
To do this you need to:
- Click on the file
- Navigate to the options
- Open the IFC options
- Scroll down to the fields
- Make sure they are defined as not exported

- Close the dialog by clicking on OK.
Export configuration
To export an IFC you need to:
- Return to the File menu
- Click on export
- Select IFC
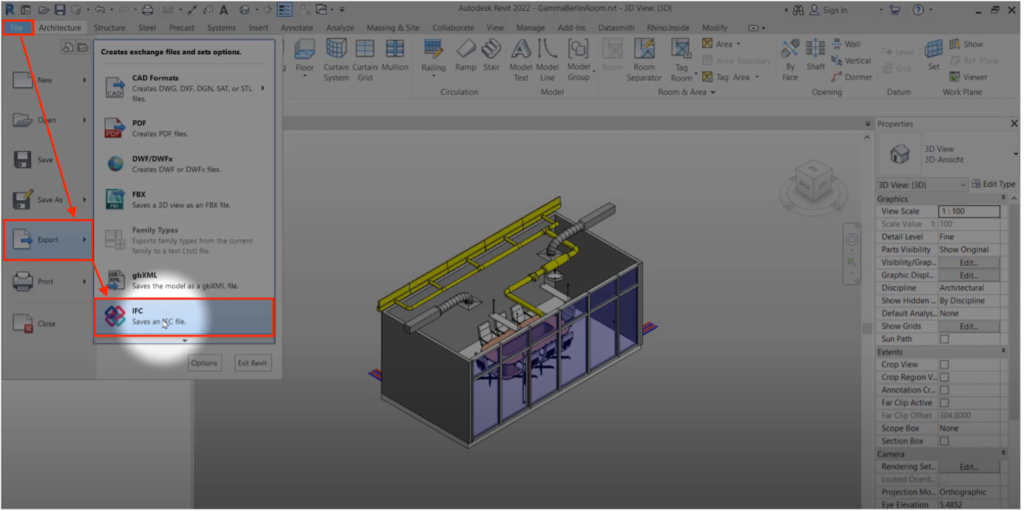
- Select a preconfigured configuration from the dropdown menu
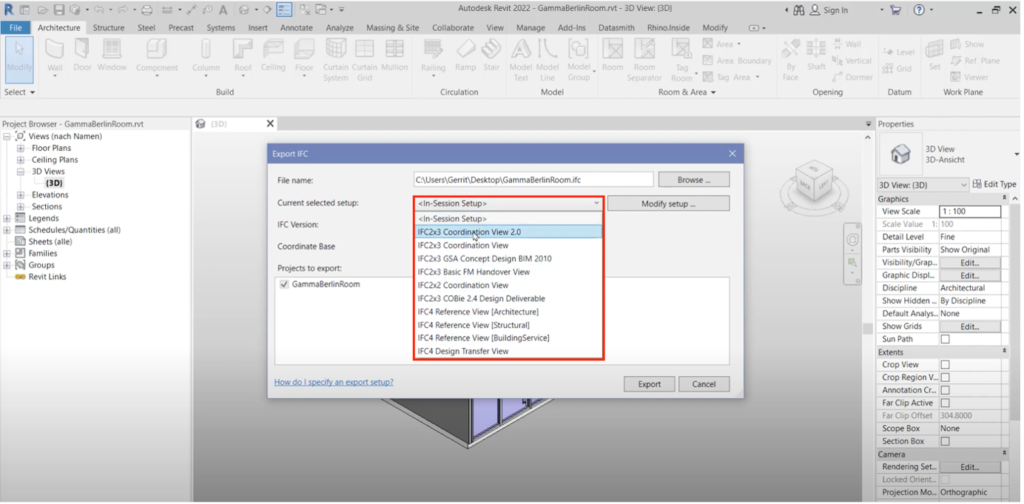
-
Or click on the button on the right to define the configuration manually
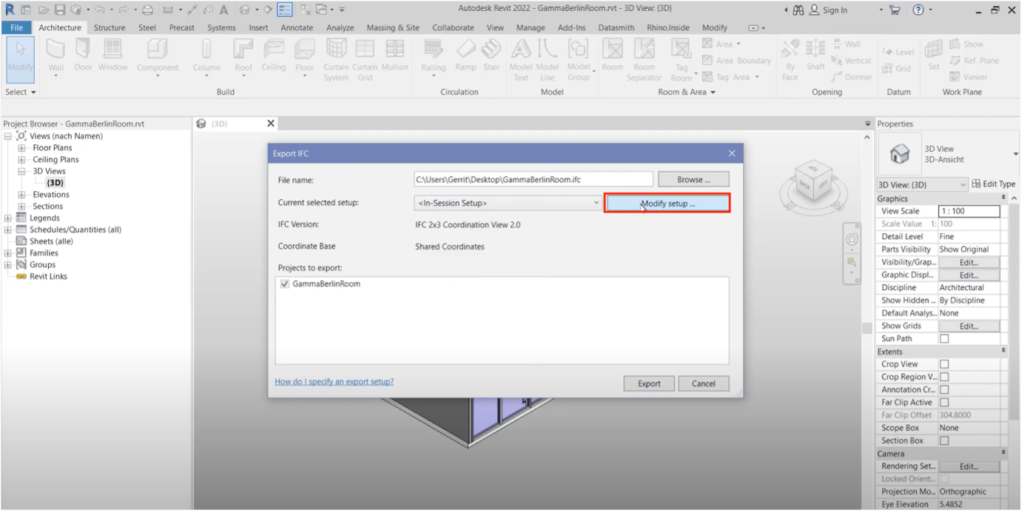
Creating a new setup to save it for future use
You can set up the configuration in-session once, but since we want to use the export function frequently to use the GAMMA AR application, you first need to:
- Create a new configuration
- Naming it accordingly
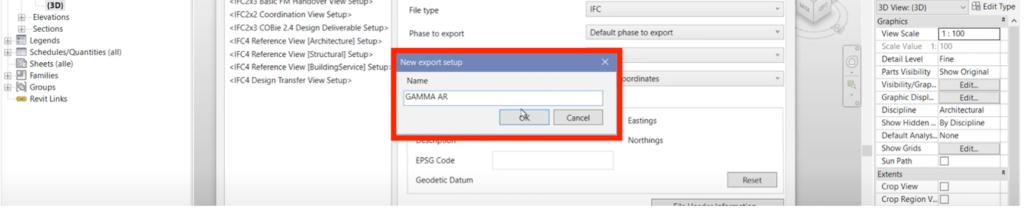
- Naming it accordingly
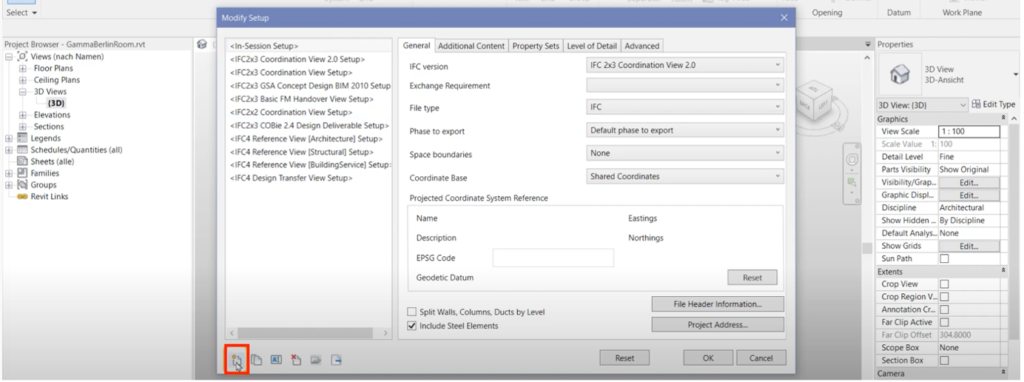
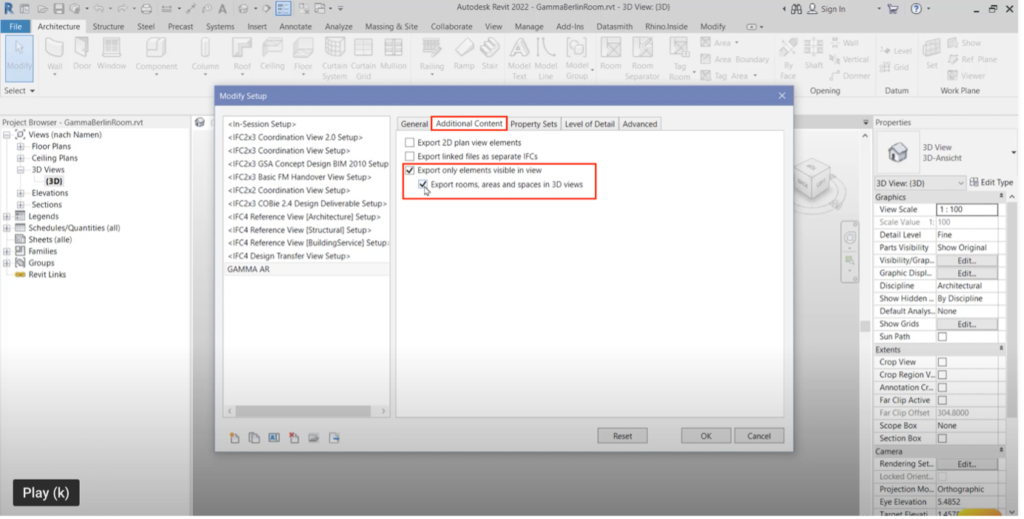
Configure the additional content tab
In the additional content tab, you should:
- Check the boxes only elements visible in the view
- Check the box export rooms areas and spaces in 3d views
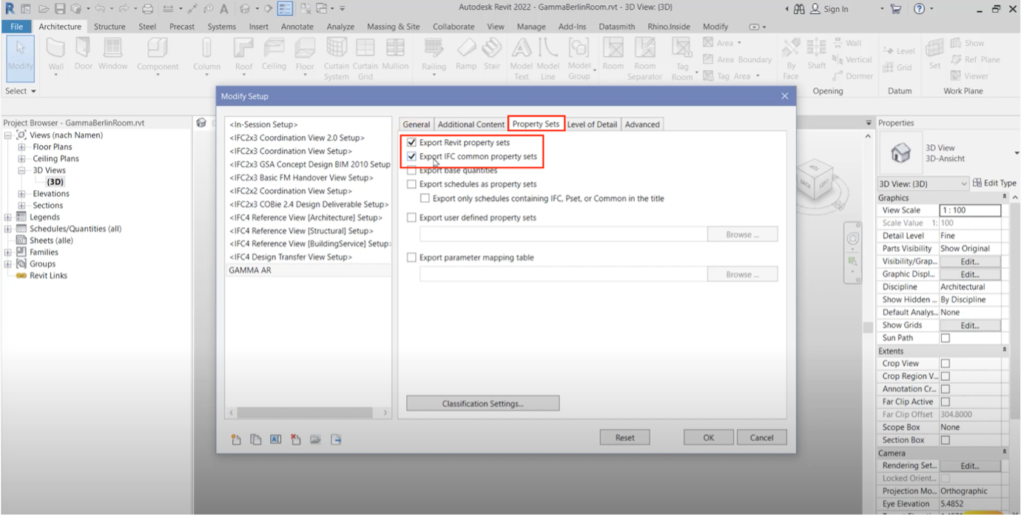
Configure the properties sets tab
In the properties sets tab you need to:
- Check the box export Revit property sets,
- Check the box export IFC common properties sets.
Configuration to control the level of detail
To control the level of detail of the exported IFC model you need to set it in the level of detail tab.
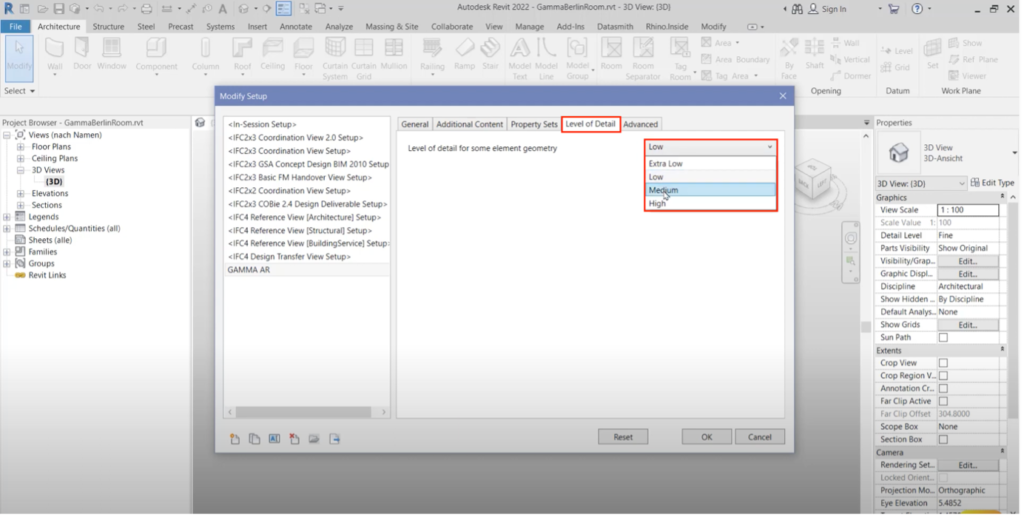
This overrides the old settings at the bottom of the view screen for some more complex geometry.

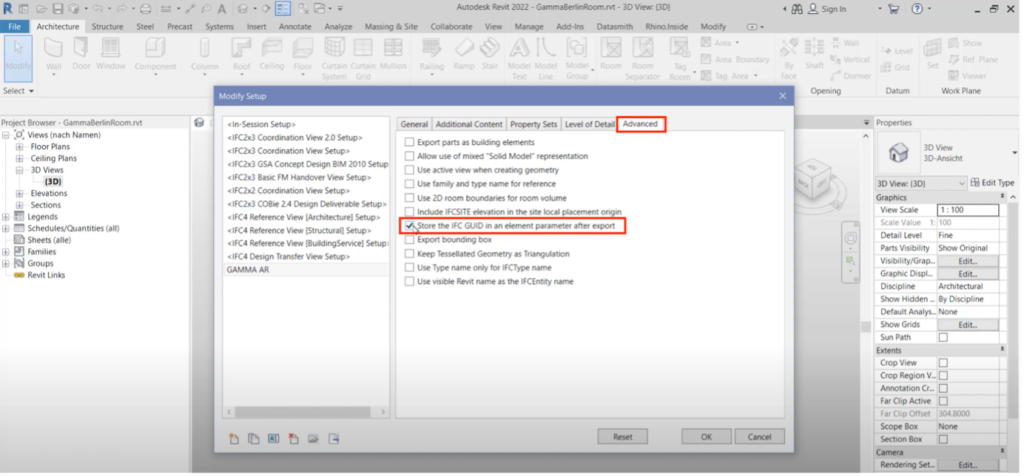
Configure the advanced tab
In the advanced tab you can store the IFC globally unique identifier or GUID as a parameter by checking the respective box this appends the same IFC guide as a parameter to the objects within the Revit file.
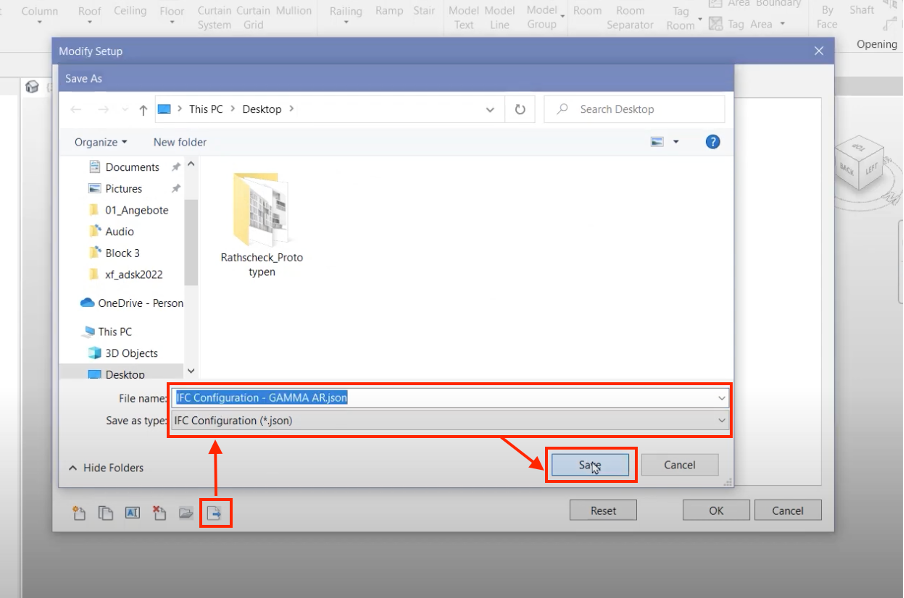
Save the configuration to be able to share it with other users
To save the configuration to be able to share it with other users you should:
- Click on the save selected setup icon
- Save this configuration in the folder of your choice
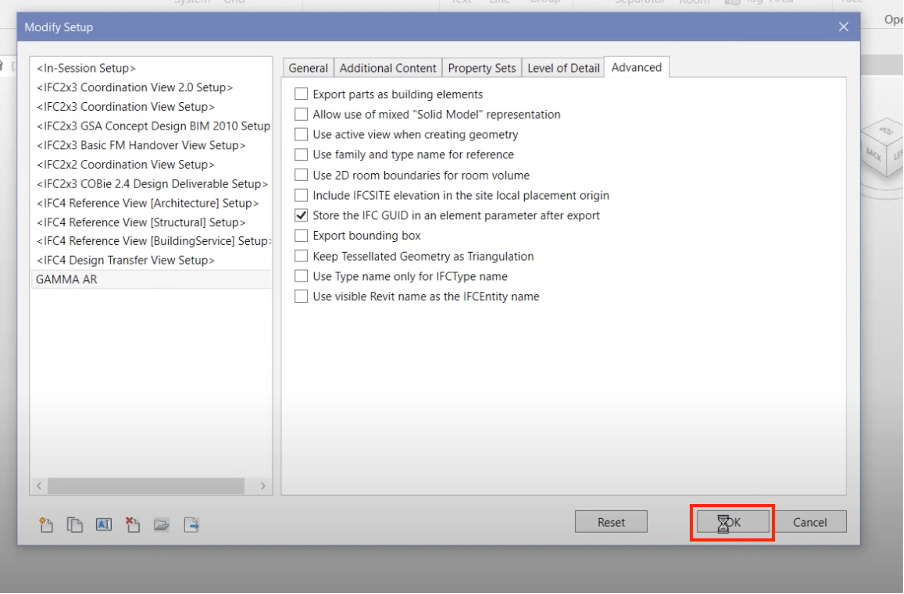
Once you have finished modifying all the settings, you must close the configuration modification dialog by clicking on ok.
Save the IFC to the location of your choice
To save the IFC to the location of your choice you need to:
- Set a path in the file name or browse to the chosen location
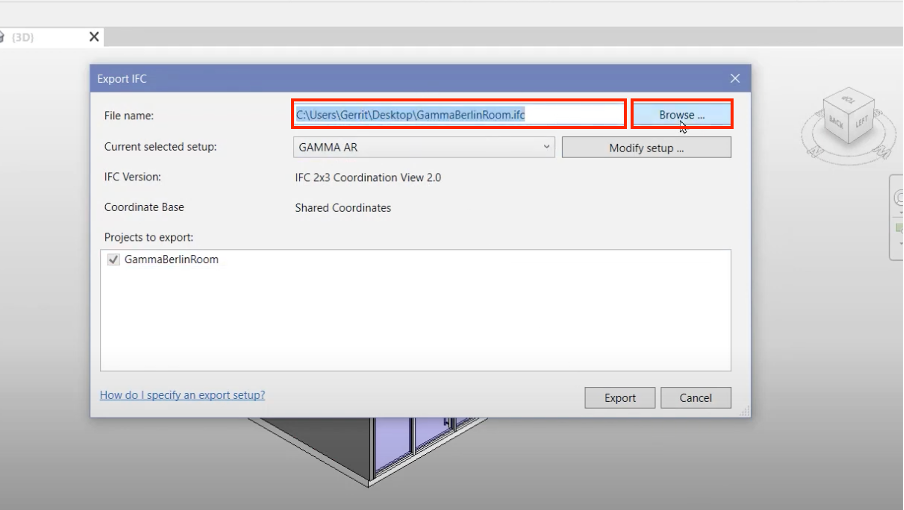
- Click on save
Start the export
- Make sure that the input parameters are the correct ones
- Press “export” to start the exportation

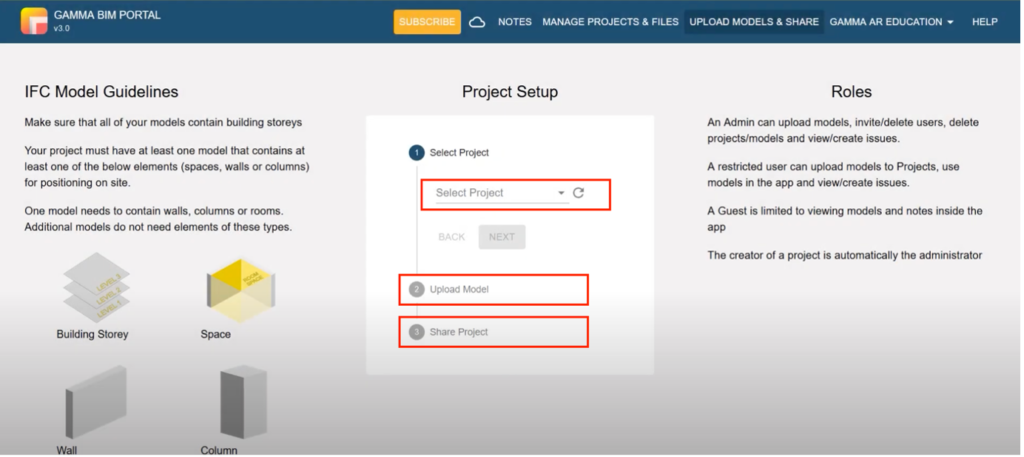
Step 3: Upload the IFC file to GAMMA AR
Once the IFC file is ready, you must upload it to GAMMA AR, to do this you have to:
- Connect to the GAMMA AR platform by following this link https://portal.gamma-ar.com/signin?lng=en&_ga=2.124553610.1484044851.1648222764-2045562789.1648222764
- Create a new project
- Add your IFC file
Once the download is complete, you can explore your project using the GAMMA AR application.
We hope this tutorial has been useful for you. If you have any further questions, you can contact us through our social channels or write us at the following email address [email protected]
About GAMMA AR
GAMMA AR is a Construction App that brings BIM models to the construction site using Augmented Reality. Check out the features of the software and start your 30-day free trial now.
If you have any questions or need support, send us an email at [email protected]
Start your 30-day free trial now

